
Tester Cables
The test cables that come with your analyzer are consumable items. Cables are like tires in that the more you use them and the harder you drive them, the shorter their useful life. Here are a few things you can do to protect your test cables from damage and premature wear:
Cleaning Clamps
- The grease, dirt, and sulfation that build up on battery terminals are highly corrosive and can damage the clamps over time. Before connecting the clamps, ensure accurate test readings and protect the clamps by cleaning the battery case and terminals using a wire brush and a mixture of water and baking soda.
- Periodically clean the clamps using a mixture of baking soda and water, or a mild hand-soap, and a small bristle brush.
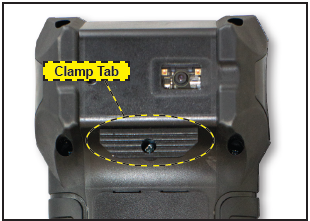
- To protect the clamps from oil and dirt, clip them to the Clamp Tab on the back of the analyzer.
Handling Test Cables
- Always connect and disconnect the clamps to the battery by opening and closing the clamps. Never pull on the test cables to remove the battery clamps. Pulling can damage the Y-junction, the cables, and the clamps to the extent that the analyzer may produce lower-thanexpected conductance readings or fail completely.
- Never carry the analyzer by the cables. Carrying the analyzer or swinging it by the cables puts unnecessary strain on the cables and can result in premature failure. Handle the analyzer with care to get the maximum use from the product.
Storing Test Cables
- Never wrap the cables around the analyzer; this puts unnecessary strain on the test cables.
Because the test cables are the “tires” of the analyzer, they have a certain life expectancy and will wear out eventually. However, the abuse examples cited above are not covered under warranty. To ensure the best performance and longest life of the test cables, attach and remove them with care, and carry the analyzer and cables together.
If an inspection or a change in test results indicate that the test cables need to be replaced, call your local customer service or distributor.
Printer Paper
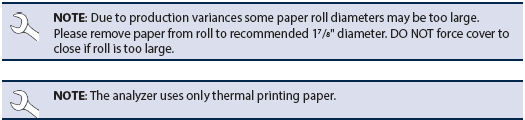
The internal printer is shipped with a roll of 2¼” wide by 17/8″ in diameter thermal printing paper installed. Replacement rolls are available through Midtronics or online office supply websites.
Replacing The Paper Roll
- Unlock the printer door by gently lifting up on the release.
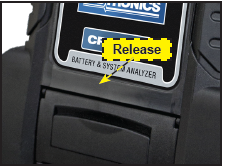
2. Lift the printer door and remove the spent roll.
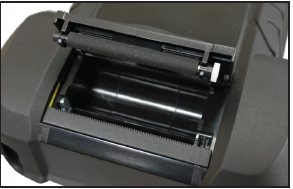
- Place a new roll of paper in the compartment. The paper feeds from the bottom of the roll.
- Pull the paper forward so that it extends past the serrated edge of the paper slot.
- Close the door and make sure the lever locks securely. For a clean tear, pull the paper along the serrated edge. Do not pull the paper straight out of the printer.
Replacing The Internal Batteries
- Turn the analyzer face down.
- Use a Phillips screwdriver to remove the screw securing the door to the battery compartment.
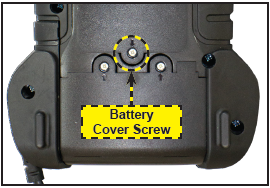
3. Lift the door at the tab and place it aside.

- Remove the discharged batteries.
- Insert new batteries as shown. Make sure the positive and negative terminals are positioned correctly.
- Reposition the door on the battery compartment.
- Reinsert and tighten the screw.